This tutorial follows one New Employee Application from creation to its final PDF report. It shows how to create the run, set its profile answers, review the next actions, send required corrections, record the officer decision, and download the point-in-time assessment.
Before you begin
You need the New Employee Application flow from Create your first document flow. To follow the full example, you also need sample Passport and Work Contract files. Add an accommodation document only when Needs Accommodation is Yes.
1. Create the employee run
- Open Flows and select New Employee Application.
- Select New Run.
- Enter an external Reference, such as
EMP-2026-001. - Choose the Application date.
- Select Create run.
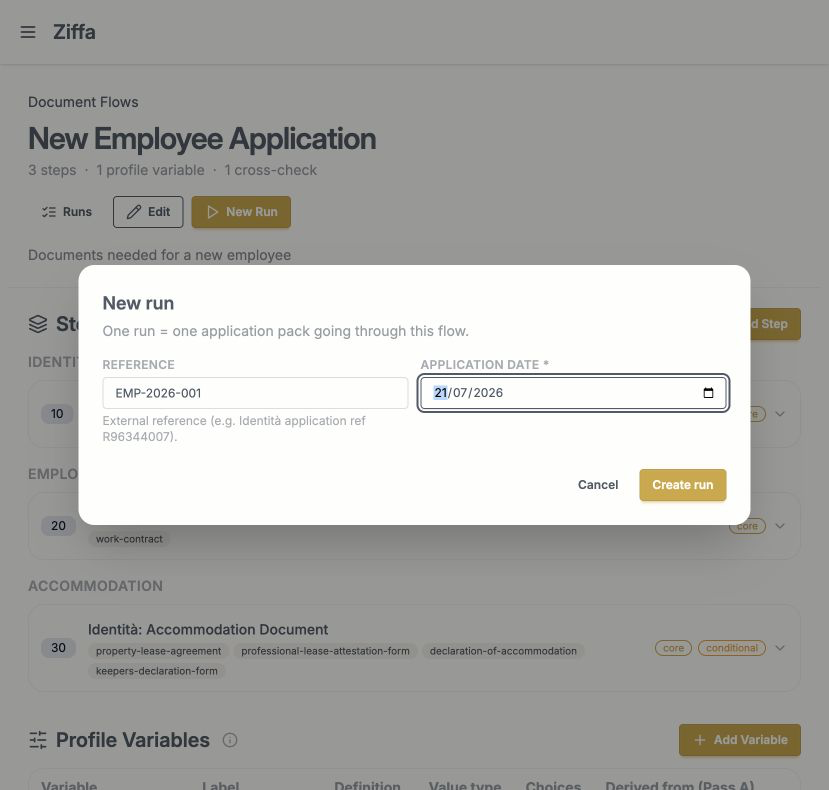
One run represents one employee application pack going through the flow.
2. Add the application answer
- Open the Application tab.
- Select Edit answers.
- Set Needs Accommodation to Yes or No.
- Save the answer.
This answer resolves the conditional accommodation step. In this example it is No, so the run requires the Passport and Work Contract but not an accommodation document.
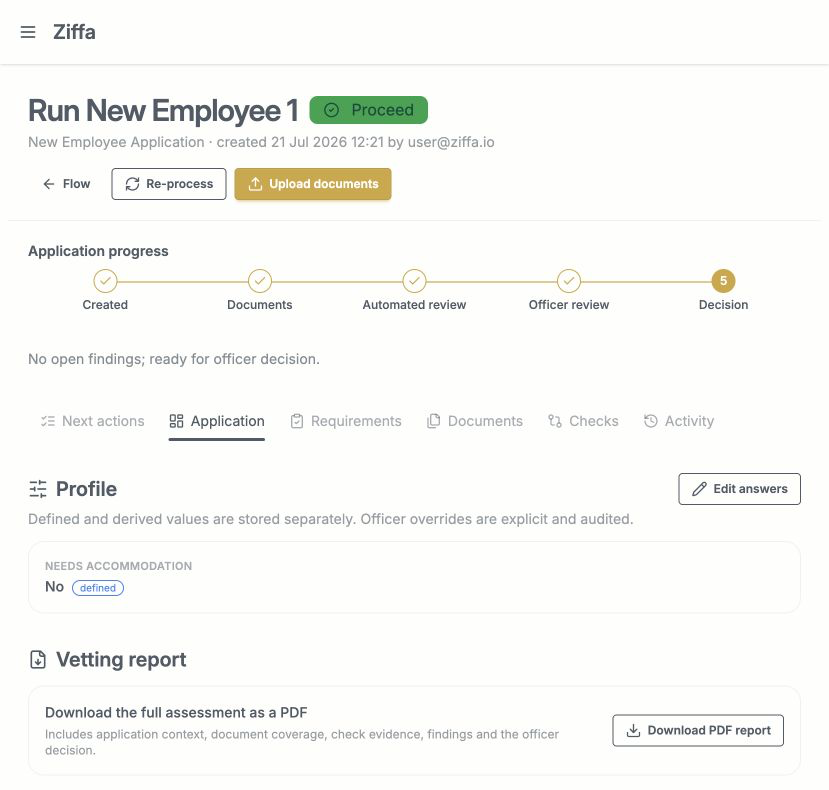
The defined badge means the value was entered for this application rather
than extracted from a document.
3. Upload and process the documents
- Select Upload documents.
- Add the files required by the resolved manifest.
- Keep Classify automatically selected unless you need to force a known document type.
- Upload the files and wait for automated review.
- Use Re-process after replacing a file or changing an answer.
The application progress bar moves from Created through Documents and Automated review. When the automated work is complete, the run moves to Officer review or Decision, depending on the findings.
4. Read Next actions
Open Next actions after processing. The application progress bar shows whether the run is collecting documents, processing, ready for an officer decision, or decided.
Start on Next actions and compare:
- the System recommendation;
- the Officer decision;
- any required fixes or internal review items; and
- the status message beneath the application progress bar.
The system recommendation supports the review. It does not replace the final officer decision.
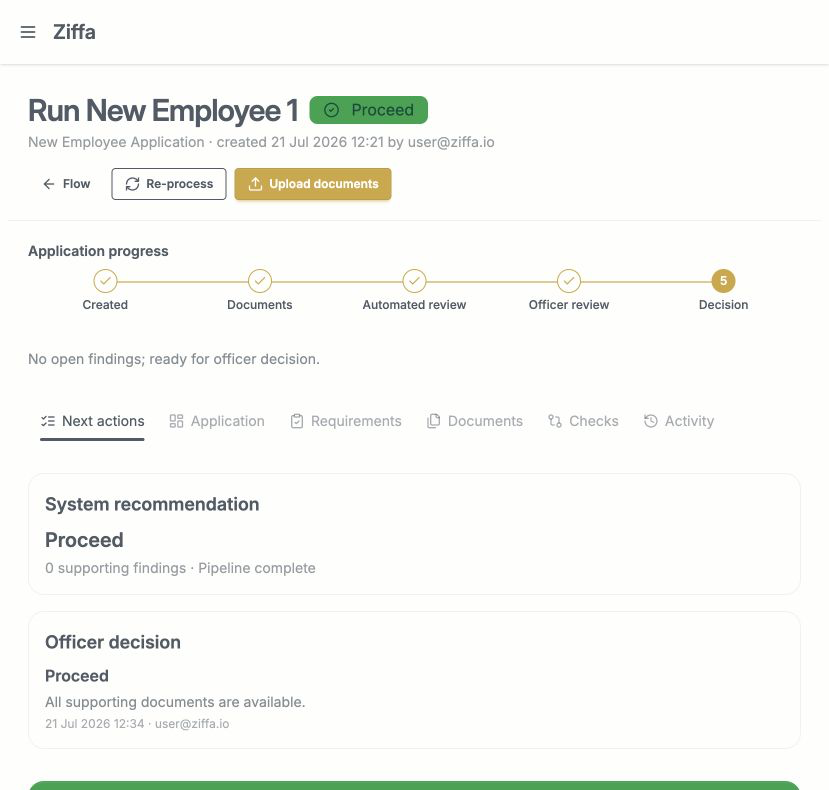
This sample has no open findings. Both the system recommendation and recorded officer decision are Proceed.
5. Review the evidence
Use the run tabs to work through the assessment:
- Application - confirm the resolved application profile and any officer overrides.
- Requirements - confirm every required document is satisfied, received, deferred, or correctly marked as not required.
- Documents - review classification, extracted data, validation errors, and manual review status for each file.
- Checks - review per-document rules and cross-document comparisons, including their evidence and SOP references.
- Activity - confirm the audit trail contains the expected officer and system actions.
Resolve or reprocess any open item before making a final decision. See the run detail reference for the meaning of each status and resolution.
6. Send corrections with Copy Email
When the run contains applicant-facing fixes, return to Next actions and find Copy Email. Ziffa prepares a plain-text draft that can include:
- missing documents;
- documents that need correction or resubmission; and
- details that do not match across the submitted documents.
To send the application back:
- read the draft and confirm that it matches the required fixes;
- select Copy to clipboard;
- paste the draft into the approved email tool;
- add the recipient and officer details; and
- send it to the applicant.
The draft is not sent automatically. Internal-only review items and manually resolved checks are excluded. If there are no applicant-facing fixes, the run shows that no applicant email draft is available.
When the applicant provides updated documents, upload them to the same run and reprocess it before recording the final decision.
7. Record the officer decision
When the run is Ready for decision, return to Next actions. Under Officer decision:
- select Proceed, Send back, or Reject;
- enter the reason for the decision; and
- select Record decision.
The recorded officer, time, decision, and reason become part of the report and the run audit trail.
8. Download the report
Under Vetting report, select Download PDF report.
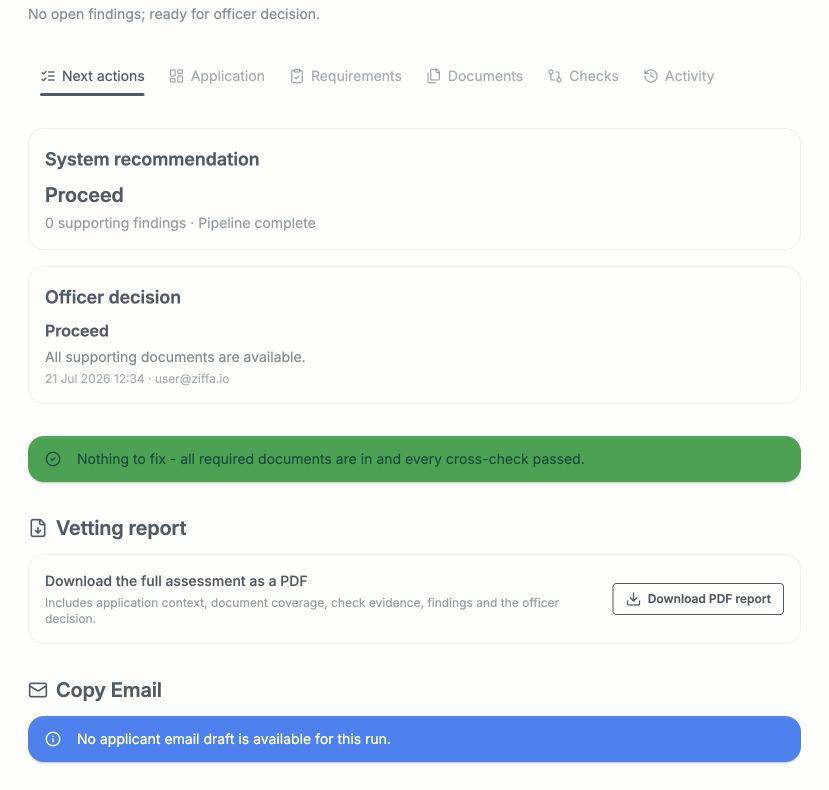
The report button is available from the run and downloads the assessment as it exists at that moment.
The report includes:
- application context and resolved profile values;
- required-document coverage and reviewed files;
- per-document and cross-document check outcomes with available evidence;
- open findings and the system recommendation;
- the officer decision and reason; and
- the chronological audit trail.
The PDF is marked confidential and records the state of the run when it is downloaded. If processing is incomplete, the report says that no recommendation has been generated and directs the officer back to the outstanding results.
Report examples
Use these examples to compare a completed assessment with a report captured before the pipeline completed.
| Example | What it demonstrates | |
|---|---|---|
| Proceed decision | A completed run with no open findings, a Proceed recommendation and a recorded Proceed decision. | Download the Proceed report |
| Incomplete pipeline | A failed or incomplete run with partial evidence, no generated recommendation and a pending officer decision. | Download the incomplete report |
Note
The example PDFs contain sample application data and are intended only to demonstrate report structure and status handling.